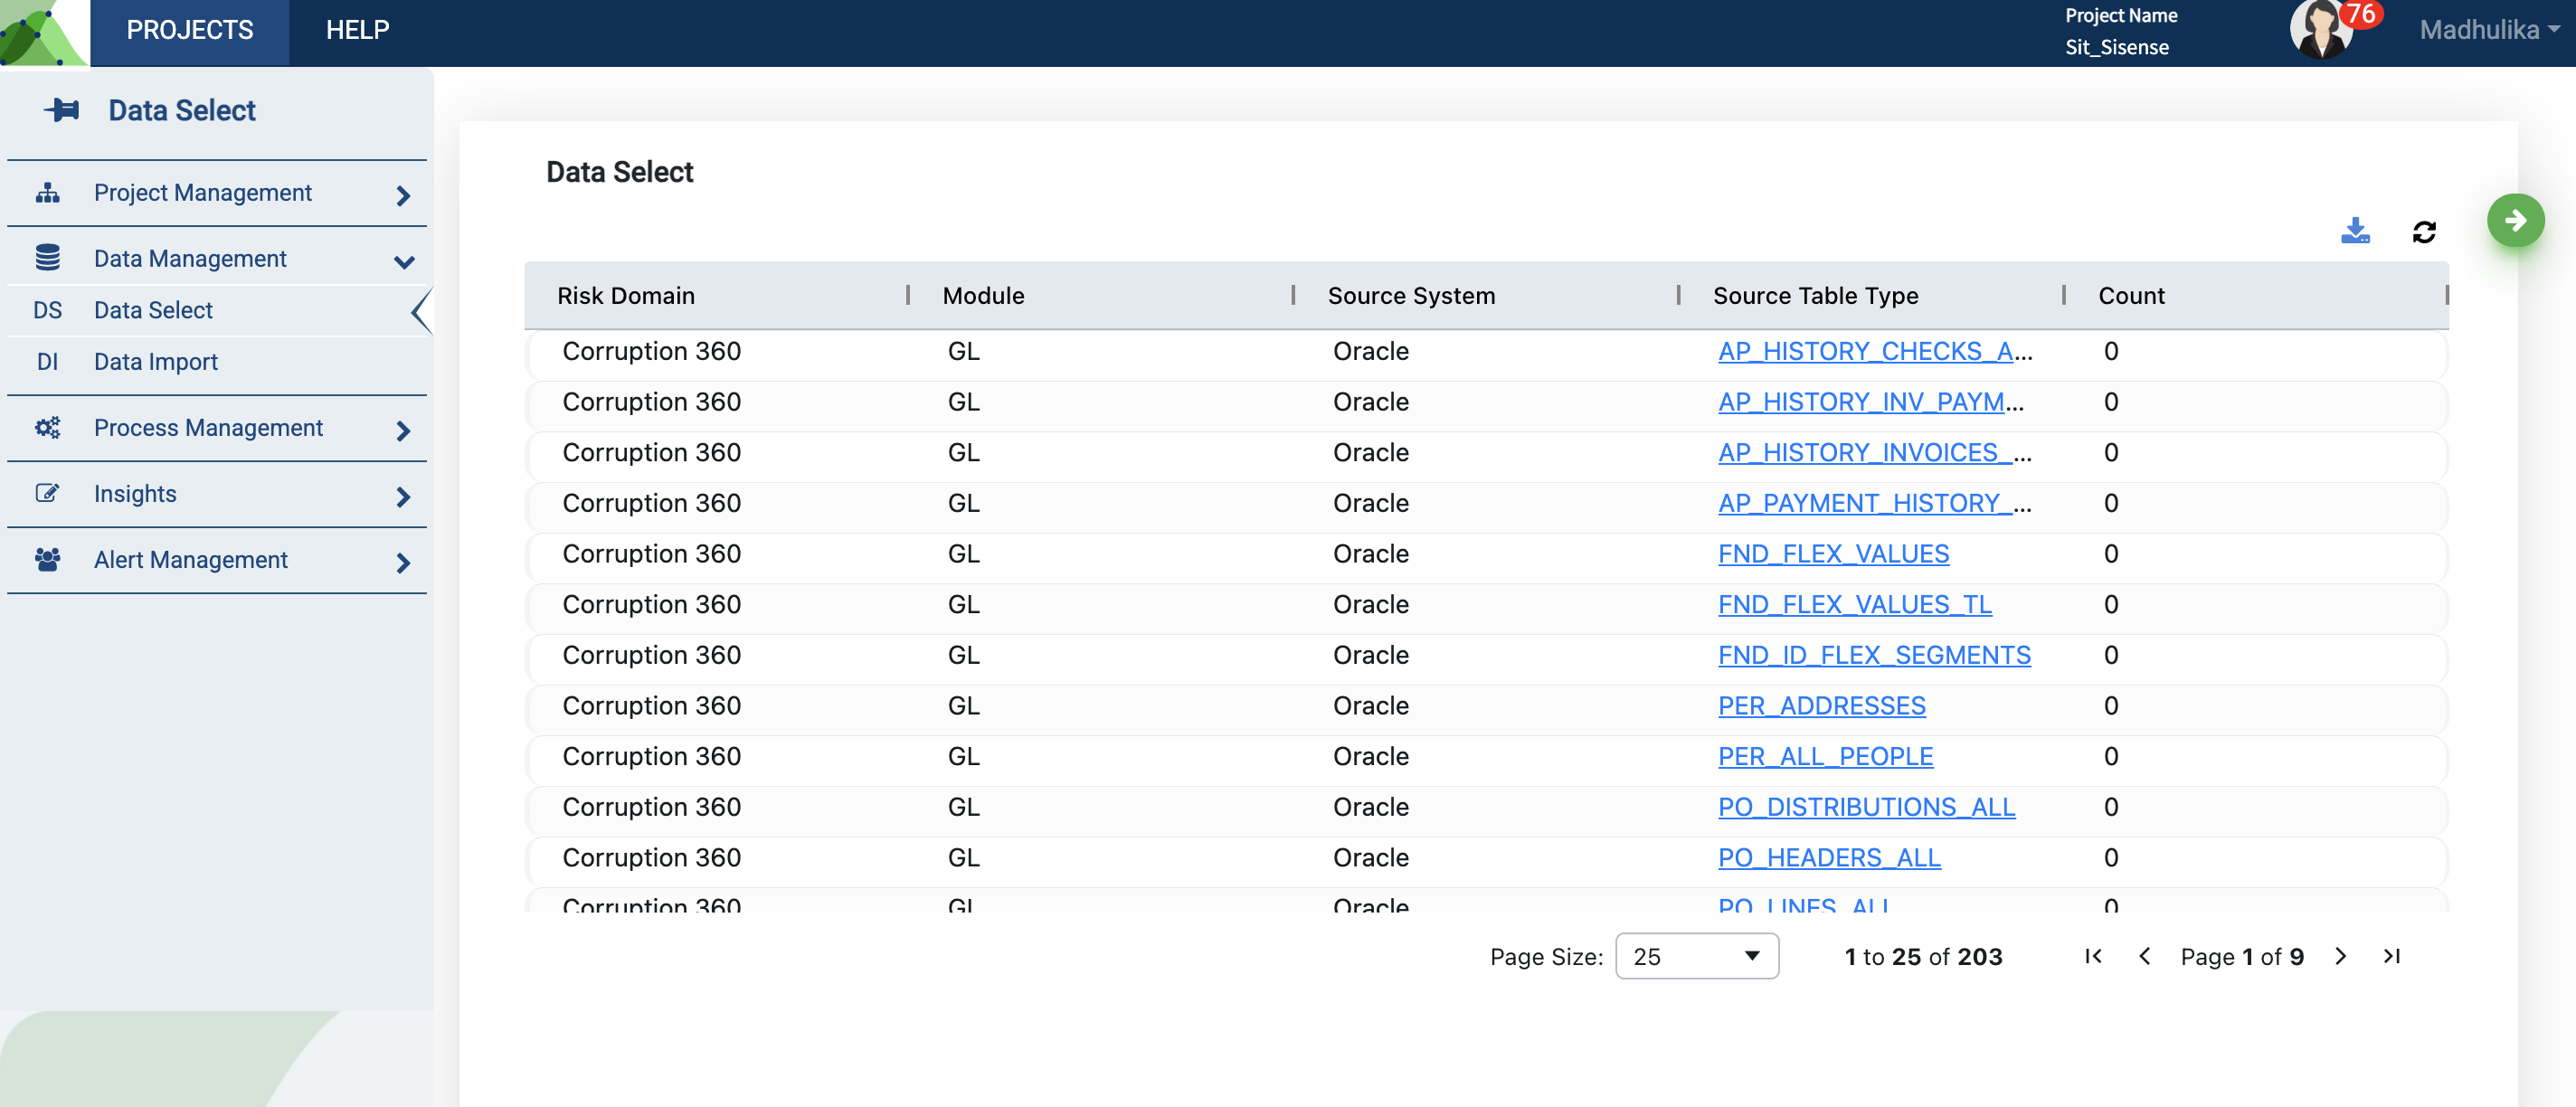
The Data Select section contains all the templates required for your project. These templates are customized to meet the project module selected in the Project Management portfolio. A modification to the module or sub-module will automatically reflect in the templates displayed.
The application is most efficient when data is uploaded in the provided template format.
You may upload your data in either .xlsx, .txt, or .csv format.
Use the download button for a .xlsx format of the entire grid showcased on your work area.
Use the refresh button if you are unable to see updated templates.
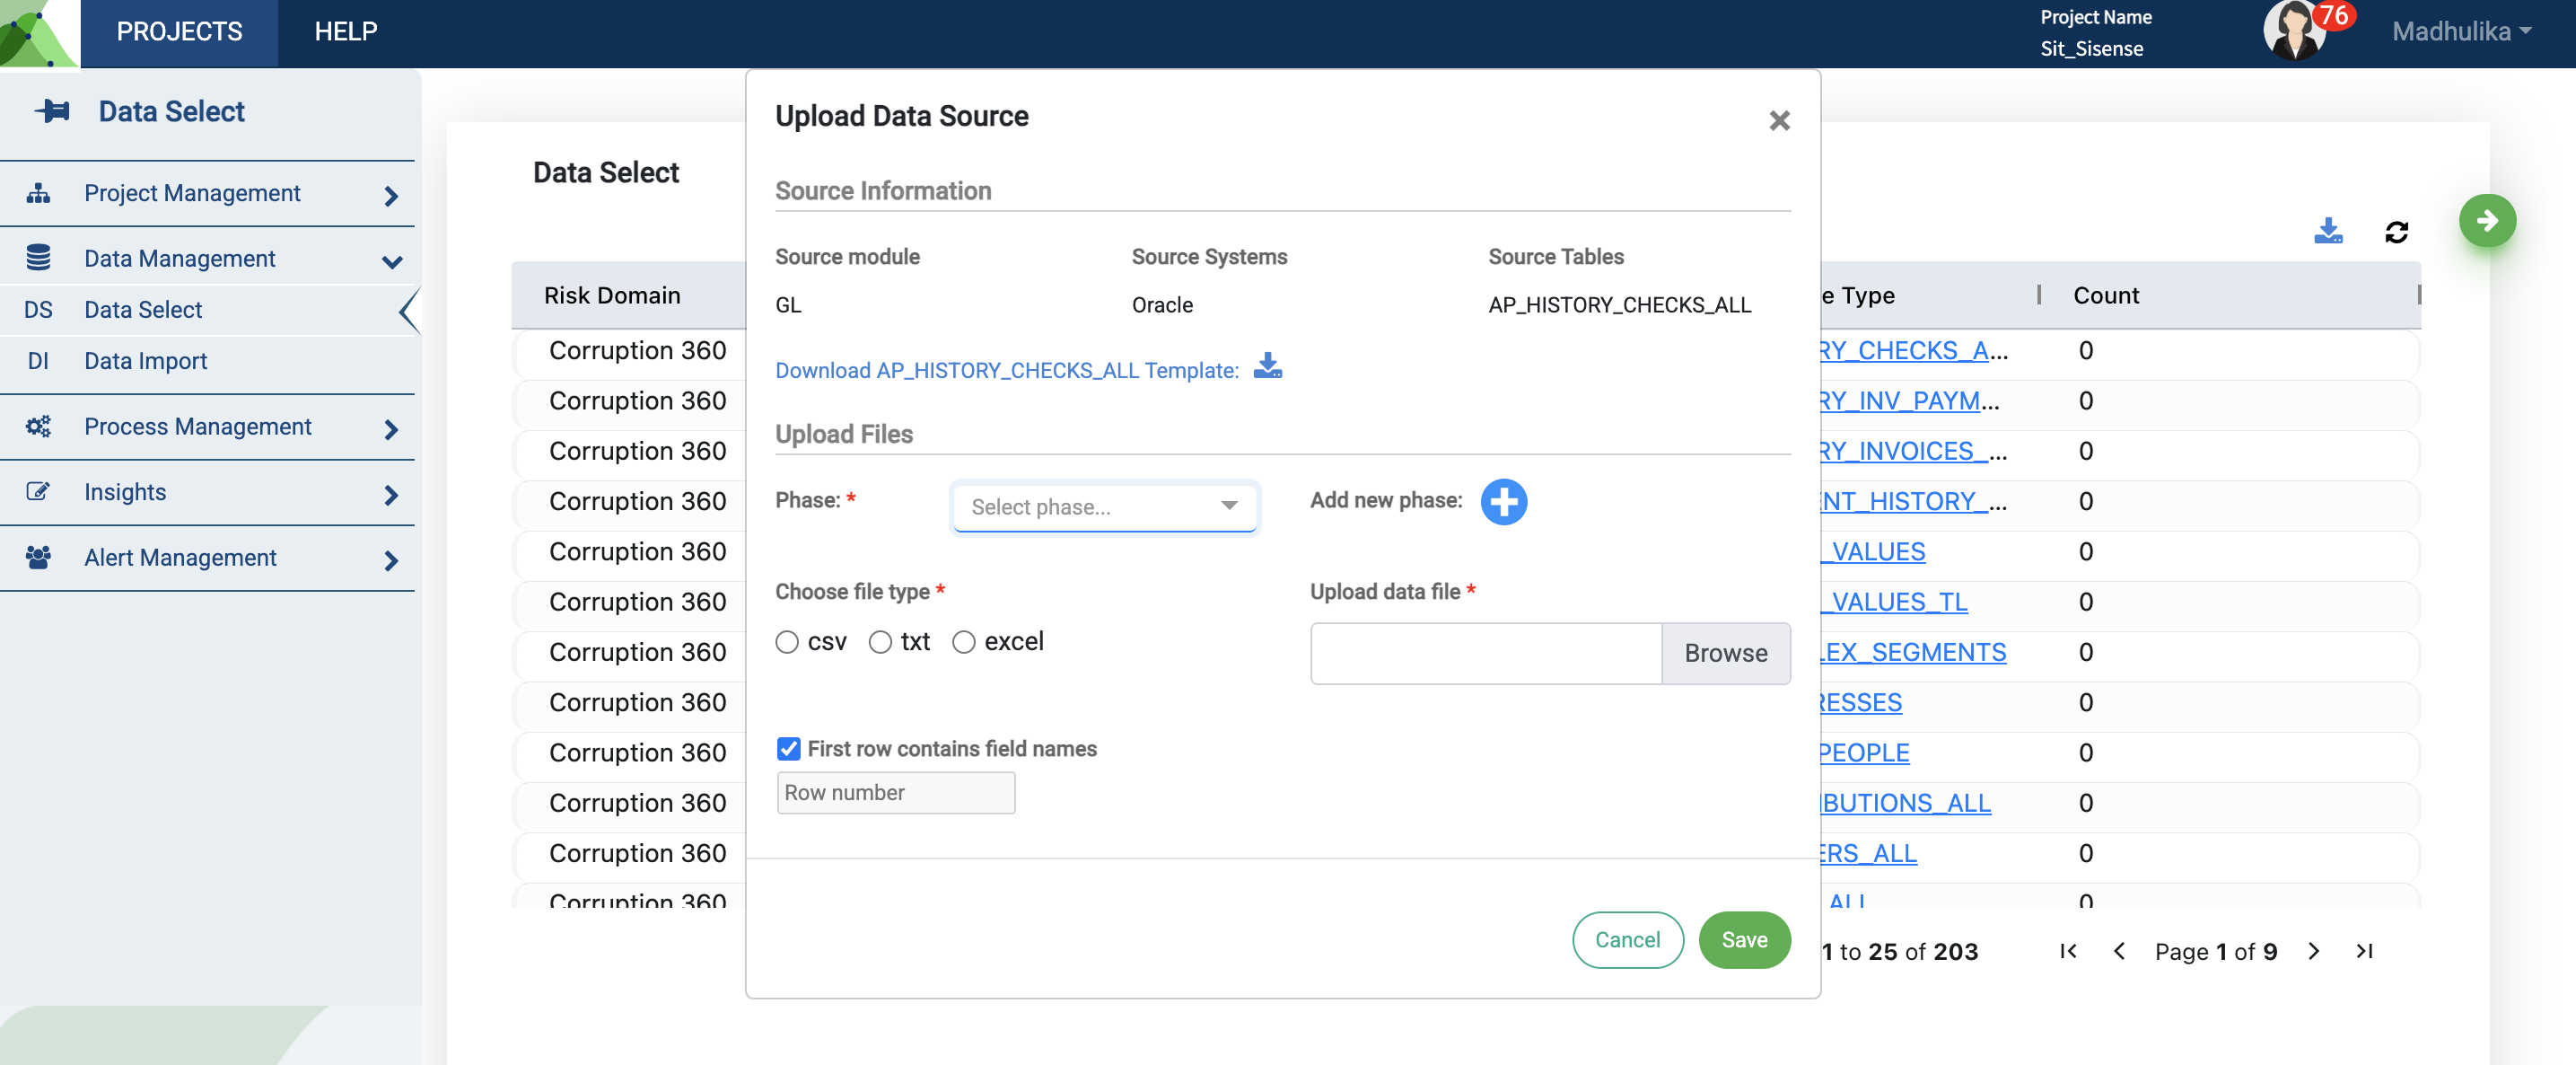
Upload Data Source
Before you begin to upload a new data set for analysis, you must first understand data requirements. To do so, go through the templates provided in the portfolio.
Click on the applicable template name to upload new data.
Provide requested information in the pop-up on your screen.
Click on the Download Template button in the pop-up to access the template.
All column names in the template are displayed in the first row.
Some columns in the template may be irrelevant to your data and can be skipped. However, ensure you adhere to the template format for consistency across data.
Phase Feature
You may upload the data in multiple files under a single phase or across different phases.
Phase feature: What if you have uploaded data in multiple files and segregated it based on the numbers of rows your .xlsx file accepts? And now you have trouble recollecting this segregation.
Phase feature fills such gaps by letting you segregate the data based on dates/months/years i.e., Jan_Files, Feb_Files or based on geographical locations i.e., Asia, Europe, North America or any other criteria and process them in phases.
You can keep track of these phases, right on the application.
The application also lets you upload multiple files for a single phase.
Choose the appropriate phase details and file type, when uploading the data.
These are mandatory fields.
File Upload
If you’ve chosen .txt or .csv file format for upload, you will need to choose the type of delimiter, to separate the fields.
Locate the data file from your system (laptop, computer, etc.), and click on Save to upload the file for processing.
The progress bar appears while your file is being uploaded, this in turn disables the Save and Cancel buttons.
Bulk Upload
Users can also benefit from the bulk upload feature and upload numerous large data sets.
.png)
To utilize the bulk upload feature, click on the green “Bulk Import” button on the top right corner of your work area.
Fill in all relevant details displayed on the screen
Click save and data will begin to get populated to your project.
.png)
Things to remember when importing data in bulk
Users must add the source system from which they wish to import data as well as the module and sub-module to which they would like this data to be added to.
Users must select whether import process is manual (must be done by person each time) or automatic type (schedule must be added for periodic uploads).
Note: The path cannot be added directly; only server path access is allowed such as Blob/Azure Portal paths and network/server access information.
The konaAI application is designed to segregate data by different source types and will display in the grid accordingly. Once uploaded, it will be displayed in the Data Import screen and can be used for analysis and processing. The history tab on your screen displays the list of when data was imported into the application, status of import etc.
.png)